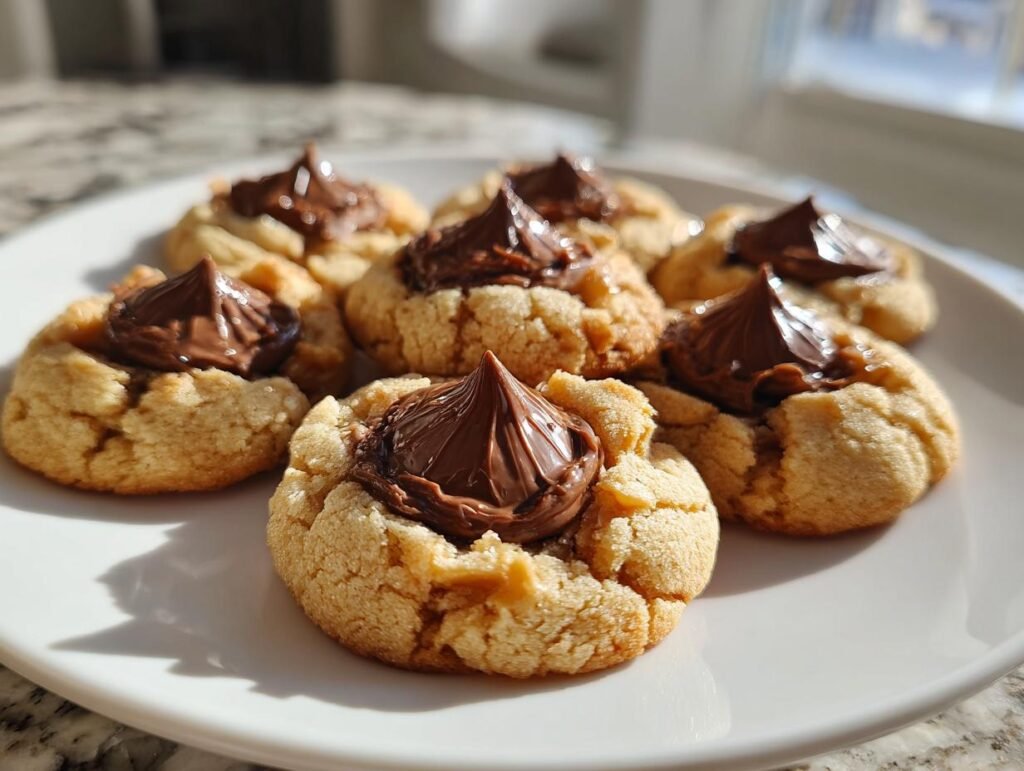
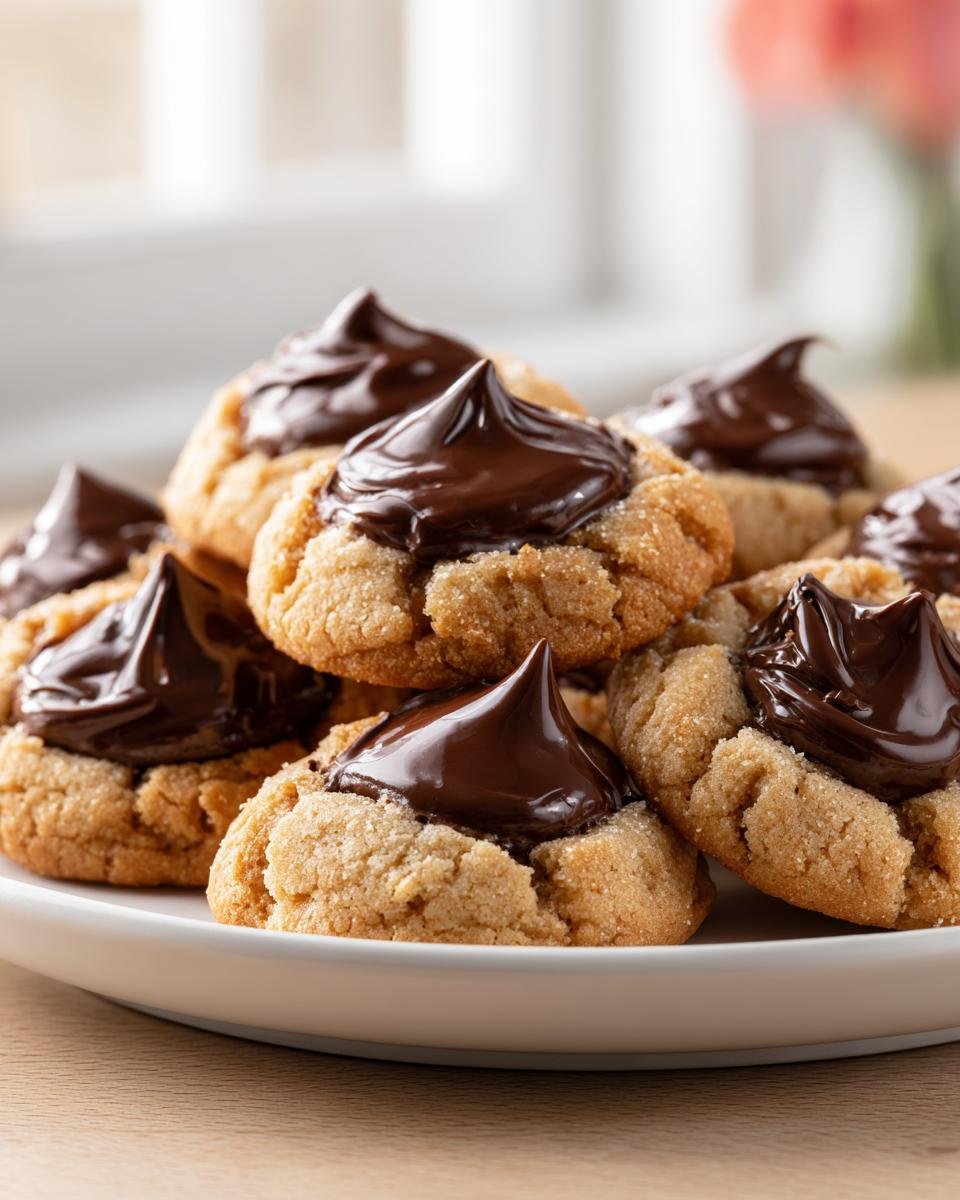
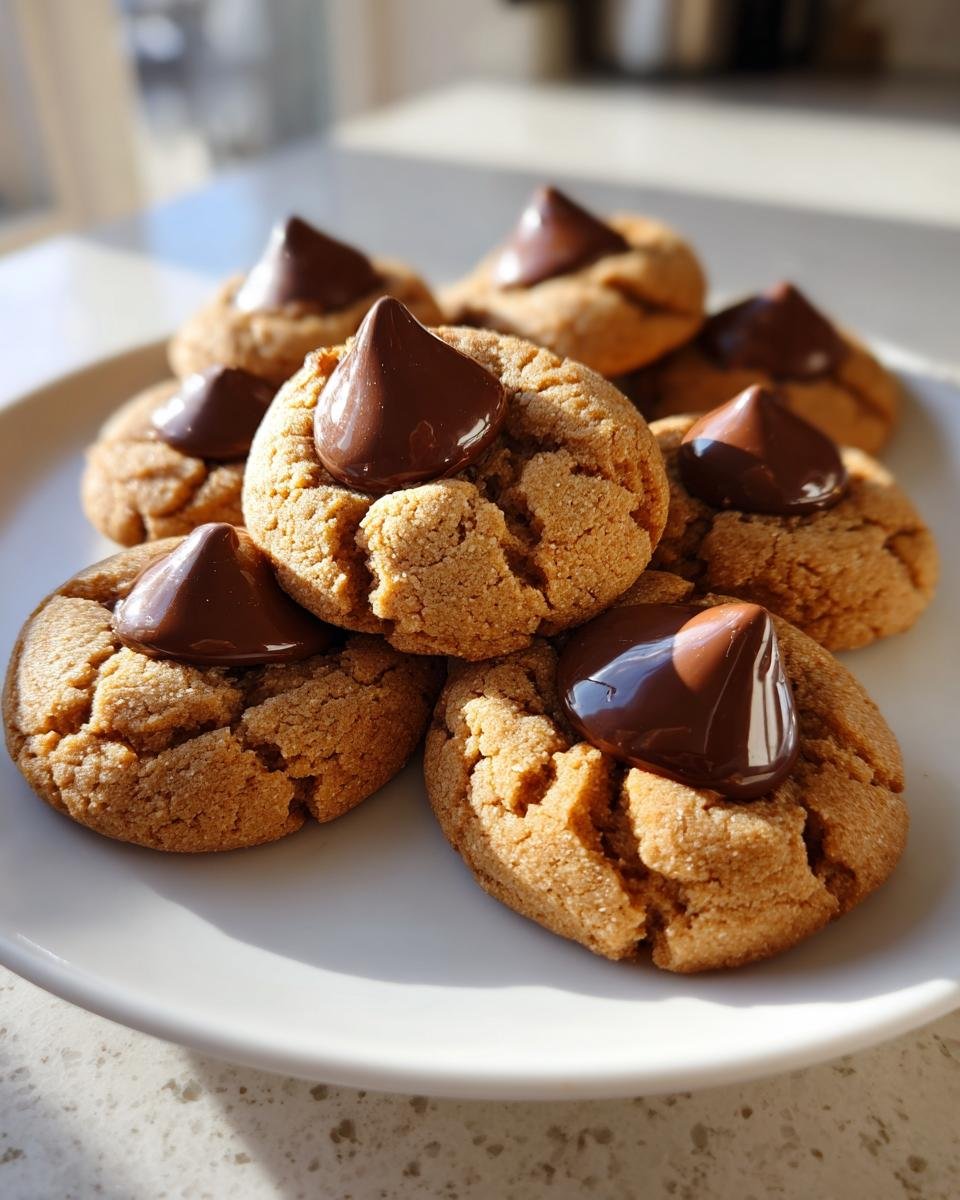
Ah, the holiday season! There’s something magical about the air turning crisp and the scent of freshly baked cookies wafting through the house. I can just picture it: the kids bustling around, laughter filling the kitchen, and that sweet anticipation of biting into a warm, gooey cookie. One of my absolute favorite treats to whip up during this time is the Holiday Peanut Butter Blossom Cookies. These little delights are not only incredibly easy to make but also bring a festive flair with their perfect combination of creamy peanut butter and luscious chocolate kisses. Trust me, they’re always a hit at family gatherings and cookie swaps alike!
With just a handful of simple ingredients, you can create a beautiful batch of cookies that’ll warm hearts (and bellies!). Plus, they bake up in no time, so you can enjoy that holiday cheer without spending hours in the kitchen. So, roll up your sleeves, grab your mixing bowl, and let’s dive into this delightful recipe that’s bound to become a beloved tradition in your home!
Ingredients List
Gathering the right ingredients is the first step towards creating these scrumptious Holiday Peanut Butter Blossom Cookies. Here’s what you’ll need:
- 1 cup peanut butter
- 1 cup sugar
- 1 egg
- 1 tsp vanilla extract
- 24 chocolate kisses, unwrapped
Make sure to have everything ready before you start mixing. It’ll make the process smoother and more enjoyable – plus, who wants to be digging through the pantry when the cookie dough is calling? Happy baking!
How to Prepare the Holiday Peanut Butter Blossom Cookies Recipe
Now that you’ve got your ingredients ready, let’s jump into the fun part—making these delightful cookies! Trust me, it’s easier than you might think, and the process is filled with that cozy holiday spirit.
Preheat the Oven
First things first, you’ll want to preheat your oven to 350°F (175°C). This step is crucial because it ensures your cookies bake evenly and come out perfectly golden. So, go ahead and set that temperature while you mix your ingredients!
Mix the Ingredients
In a large mixing bowl, combine 1 cup of peanut butter, 1 cup of sugar, 1 egg, and 1 teaspoon of vanilla extract. Now, here’s a little tip: use a sturdy wooden spoon or a hand mixer to blend everything together until it’s nice and smooth. You want to make sure there are no lumps left behind, so take your time mixing—about 2-3 minutes should do the trick. The mixture will get a bit fluffy, and you’ll start to smell that heavenly peanut butter aroma!
Shape the Dough
Once your dough is ready, it’s time to get rolling—literally! Grab a small scoop or just use your hands to roll the dough into 1-inch balls. Place them on a baking sheet lined with parchment paper, leaving about 2 inches of space between each ball. This is important because they’ll spread a little while baking, and we want them to have room to shine!
Bake the Cookies
Pop those beauties in your preheated oven and bake for about 10-12 minutes. You’ll know they’re ready when the edges are set, and the tops look slightly cracked. Don’t worry if they look a little soft; they’ll firm up as they cool. Just keep an eye on them to avoid over-baking!
Add the Chocolate Kisses
As soon as you pull the cookies out of the oven, it’s time for the pièce de résistance! Quickly press a chocolate kiss into the center of each cookie while they’re still warm. This step is not only delicious, but it also makes them look so festive and inviting!
Cooling and Serving
Let the cookies cool on the baking sheet for about 5 minutes before transferring them to a wire rack. This cooling time helps them set perfectly. I know it’s tough to wait, but trust me, letting them cool will ensure they hold their shape and taste even better. Once they’re cool, serve them up, and watch everyone’s eyes light up with joy!
Nutritional Information Section
Now, let’s talk about what’s in each of these delightful cookies! Below are the typical nutritional values per cookie. Keep in mind that these numbers are estimates, but they give you a good idea of what you’re enjoying with each scrumptious bite:
- Calories: 100
- Sugar: 10g
- Sodium: 50mg
- Fat: 5g
- Saturated Fat: 1g
- Unsaturated Fat: 3g
- Trans Fat: 0g
- Carbohydrates: 12g
- Fiber: 1g
- Protein: 2g
- Cholesterol: 5mg
These cookies are a sweet treat to enjoy during the holidays, and knowing their nutritional info can help you indulge a little guilt-free. Enjoy every bite!
Why You’ll Love This Recipe
- Quick Prep: This Holiday Peanut Butter Blossom Cookies Recipe comes together in just 15 minutes! You won’t be stuck in the kitchen for hours, which means more time to enjoy the festivities.
- Easy Ingredients: With only four simple pantry staples, you’ll find that making these cookies is a breeze. It’s likely you already have peanut butter, sugar, eggs, and vanilla on hand!
- Delicious Combination: The classic pairing of creamy peanut butter and rich chocolate kisses creates a mouthwatering flavor explosion that’s simply irresistible.
- Festive Appearance: These cookies don’t just taste amazing; they look delightful too! The shiny chocolate kisses sitting atop the golden-brown cookies add a cheerful touch to your holiday cookie platter.
Trust me, once you try these cookies, they’ll become a staple in your holiday baking lineup! Each bite is a little piece of joy that brings the spirit of the season right to your taste buds.
Tips for Success
To ensure your Holiday Peanut Butter Blossom Cookies turn out absolutely perfect, here are some pro tips that I’ve picked up over the years. Trust me, following these will make your baking experience smoother and your cookies even more delightful!
- Check Your Peanut Butter: Use a creamy peanut butter that’s well-stirred. Oil separation can occur, so give it a good mix before measuring. This ensures a consistent dough that won’t be too sticky.
- Chill the Dough If Needed: If your dough feels a bit too sticky to roll into balls, pop it in the fridge for about 15-30 minutes. Chilling firms it up, making it easier to handle!
- Use Fresh Chocolate Kisses: Make sure your chocolate kisses are fresh and unwrapped right before you bake. This way, they’ll melt beautifully when pressed into the warm cookies, creating that perfect gooey center.
- Don’t Over-Bake: Keep an eye on those cookies! They should be lightly golden at the edges and soft in the center. Remember, they’ll continue to set up as they cool, so don’t be tempted to leave them in too long.
- Experiment with Toppings: While chocolate kisses are classic, feel free to get creative! Try using caramel candies, or even a sprinkle of sea salt on top of the kisses for a delightful sweet-and-salty combo.
- Let Them Cool: Resist the urge to dig in right away! Allowing the cookies to cool on a wire rack helps them maintain their shape and texture. Plus, the flavors deepen as they set!
With these tips in your back pocket, you’ll be well on your way to baking up a batch of Holiday Peanut Butter Blossom Cookies that will have everyone coming back for seconds. Happy baking!
Storage & Reheating Instructions
Once you’ve baked these delicious Holiday Peanut Butter Blossom Cookies, you’ll want to make sure they stay fresh and tasty for as long as possible. Storing them properly is key to enjoying their delightful flavor days after baking!
First things first, let your cookies cool completely on a wire rack before storing them. This step is super important because it prevents any moisture from building up in the container, which can lead to soggy cookies. Once they’re cool, place them in an airtight container. I like to use a plastic or glass container with a tight-fitting lid, but if you only have a cookie tin, that works too—just make sure it seals well!
These cookies can be stored at room temperature for about a week, and they taste just as good! If you’re looking to keep them for a longer period, you can freeze them for up to 3 months. To freeze, I recommend layering the cookies between sheets of parchment paper in a freezer-safe container. This way, they won’t stick together, and you can easily grab just a few at a time when the cookie cravings hit!
When you’re ready to enjoy those frozen treats, simply take them out of the freezer and let them thaw at room temperature for about 30 minutes. If you want that fresh-baked warmth, you can pop them in the microwave for about 10-15 seconds or warm them in the oven at 350°F (175°C) for a few minutes. They’ll be soft, gooey, and just like they came out of the oven!
With these storage and reheating tips, you’ll be able to savor your Holiday Peanut Butter Blossom Cookies whenever the mood strikes. Happy snacking!
FAQ Section
As you embark on your baking adventure with the Holiday Peanut Butter Blossom Cookies, you might have a few questions. Don’t worry! I’ve got you covered with some common queries and their answers to make your cookie-making experience even smoother.
Can I use natural peanut butter instead of regular peanut butter?
Absolutely! Just keep in mind that natural peanut butter can sometimes have a different consistency and may require a little adjustment. If it’s too runny, you might want to add a bit more sugar to help with the dough’s structure. I’ve had great success with natural varieties, and they add a lovely flavor, too!
What if I’m allergic to peanuts? Can I make a nut-free version?
Yes, you can! For a nut-free option, try using sun butter or a seed butter like tahini. Both options provide a similar creamy texture and taste, making them great substitutes. Just be sure to check the labels to avoid cross-contamination if allergies are a concern.
Can I make these cookies vegan?
You bet! To make a vegan version of these cookies, substitute the egg with a flax egg (1 tablespoon of ground flaxseed mixed with 2.5 tablespoons of water, let it sit for 5 minutes) or use a store-bought egg replacer. Just be sure to use dairy-free chocolate kisses or a similar vegan chocolate option, and you’ll have delicious cookies everyone can enjoy!
How can I make these cookies gluten-free?
To whip up a gluten-free batch, simply swap out the regular sugar with a gluten-free flour blend. I recommend using a 1:1 gluten-free flour mix, which works beautifully in this recipe. Just make sure the flour blend you choose is suitable for baking, and you’re good to go!
Can I add extras like nuts or chocolate chips?
Definitely! Feel free to add in some chocolate chips, chopped nuts, or even a sprinkle of sea salt on top of the kisses before baking. Just keep in mind that if you add too many extras, it might affect the texture, so I’d recommend not overloading the dough.
What’s the best way to store leftover cookies?
Store any leftover cookies in an airtight container at room temperature, and they’ll stay fresh for about a week. If you’re looking to keep them longer, freezing them is a fantastic option! Just remember to layer them with parchment paper to prevent sticking.
For more recipes follow me in page Pinterest.
With these FAQs, I hope you feel empowered to customize and enjoy your Holiday Peanut Butter Blossom Cookies however you like! Happy baking!
Print
Holiday Peanut Butter Blossom Cookies Recipe for Joyful Baking
- Total Time: 27 minutes
- Yield: 24 cookies 1x
- Diet: Vegetarian
Description
Delicious cookies with a peanut butter base topped with chocolate kisses.
Ingredients
- 1 cup peanut butter
- 1 cup sugar
- 1 egg
- 1 tsp vanilla extract
- 24 chocolate kisses
Instructions
- Preheat your oven to 350°F (175°C).
- In a bowl, mix peanut butter, sugar, egg, and vanilla until smooth.
- Roll the dough into 1-inch balls and place on a baking sheet.
- Bake for 10-12 minutes.
- Remove from oven and immediately press a chocolate kiss into the center of each cookie.
- Let cool before serving.
Notes
- Store in an airtight container.
- Cookies can be frozen for up to 3 months.
- Prep Time: 15 minutes
- Cook Time: 12 minutes
- Category: Dessert
- Method: Baking
- Cuisine: American
Nutrition
- Serving Size: 1 cookie
- Calories: 100
- Sugar: 10g
- Sodium: 50mg
- Fat: 5g
- Saturated Fat: 1g
- Unsaturated Fat: 3g
- Trans Fat: 0g
- Carbohydrates: 12g
- Fiber: 1g
- Protein: 2g
- Cholesterol: 5mg
Keywords: Holiday Peanut Butter Blossom Cookies Recipe