Oh my goodness, do I have a treat for you! If you’ve ever craved a delightful dessert that requires zero baking effort, then you’re going to fall head over heels for these Holiday Oreo Balls! Trust me, they’re the kind of quick and easy no-bake dessert that’ll make you the star of any holiday gathering.
These little bites of joy are perfect for sharing with family and friends, and the best part? They come together in a flash! I remember the first time I made these during a holiday party—I was running around trying to get everything ready, and these beauties saved the day. Everyone loved them, and I barely had to lift a finger! Just a few simple ingredients, and you’ve got a sweet treat that looks as festive as it tastes. So, let’s dive into this scrumptious recipe!
Ingredients List
Gather these simple yet essential ingredients to whip up your delightful Holiday Oreo Balls:
- 1 package Oreo cookies (about 36 cookies, crushed)
- 8 oz cream cheese, softened
- 2 cups white chocolate chips
- Sprinkles for decoration
How to Prepare Holiday Oreo Balls
Making these Holiday Oreo Balls is a breeze, and I’m here to walk you through it step by step! You’ll see how simple it is to whip up these delightful treats that will wow everyone at your holiday gatherings.
Step 1: Crushing the Oreos
First things first, we need to crush those Oreo cookies! Grab your food processor and toss in the package of Oreos—about 36 cookies is perfect. Pulse them until they turn into fine crumbs. You want a sandy texture, not chunks! If you don’t have a food processor, you can put the cookies in a zip-top bag and crush them with a rolling pin. Just be careful not to make a mess—trust me, it happens!
Step 2: Mixing with Cream Cheese
Now that you have those lovely crumbs, it’s time to combine them with the softened cream cheese. In a large mixing bowl, dump in the crushed Oreos and the cream cheese. Use a spatula or your hands (yep, I said it!) to mix everything together until it’s well combined. You want the mixture to be smooth and hold together nicely, so make sure the cream cheese is really softened. If it’s too stiff, it won’t blend properly, and we want that creamy goodness to shine through!
Step 3: Forming the Balls
Once your mixture is ready, it’s time to roll them into balls! Grab a small amount of the mixture (about a tablespoon) and roll it between your palms to form a ball. Make sure they’re uniform in size; this way, they’ll all set up nicely and look pretty on your platter. A cookie scoop can be a lifesaver here if you have one—it helps keep everything consistent!
Step 4: Freezing the Balls
Now, let’s get those balls in the freezer! Place them on a baking sheet lined with parchment paper and pop them in the freezer for about 30 minutes. This step is super important because it helps them firm up, making it way easier to dip them in chocolate later. Plus, who doesn’t love a little chill time before the sweet transformation?
Step 5: Melting the Chocolate
While your balls are freezing, let’s get that white chocolate ready! You can melt the chocolate chips in a microwave-safe bowl in short bursts of 30 seconds, stirring in between, or use a double boiler on the stovetop. If you choose the microwave, just be careful not to let it burn—chocolate can be a diva! Stir until it’s smooth and perfectly melted.
Step 6: Coating the Balls
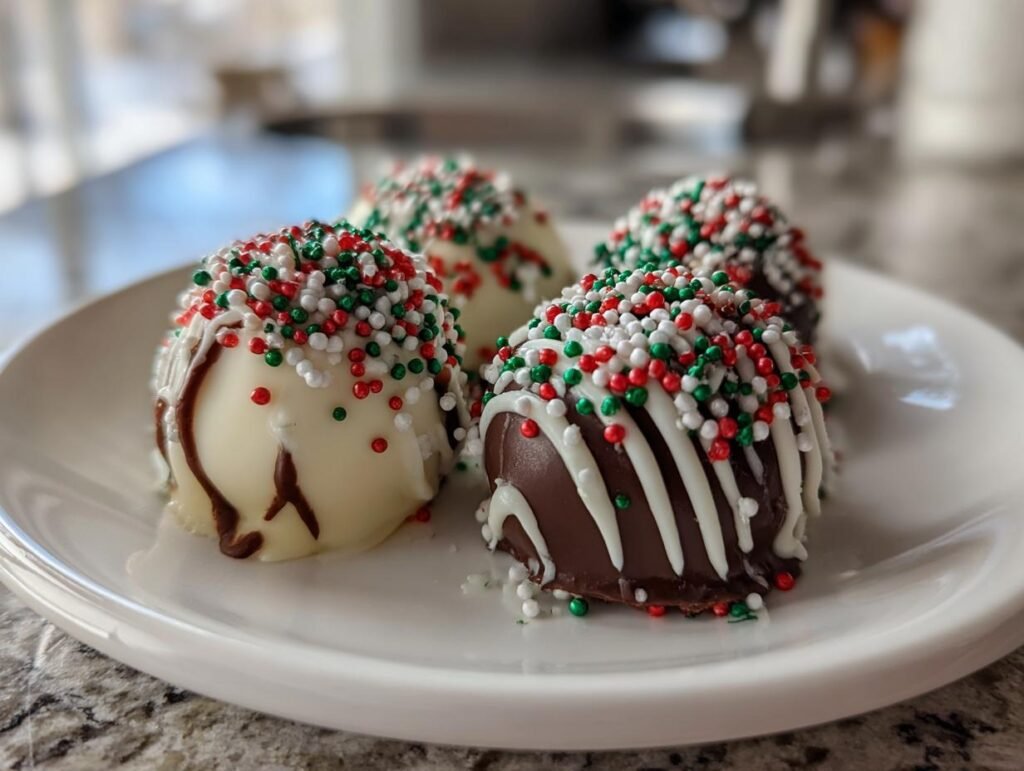
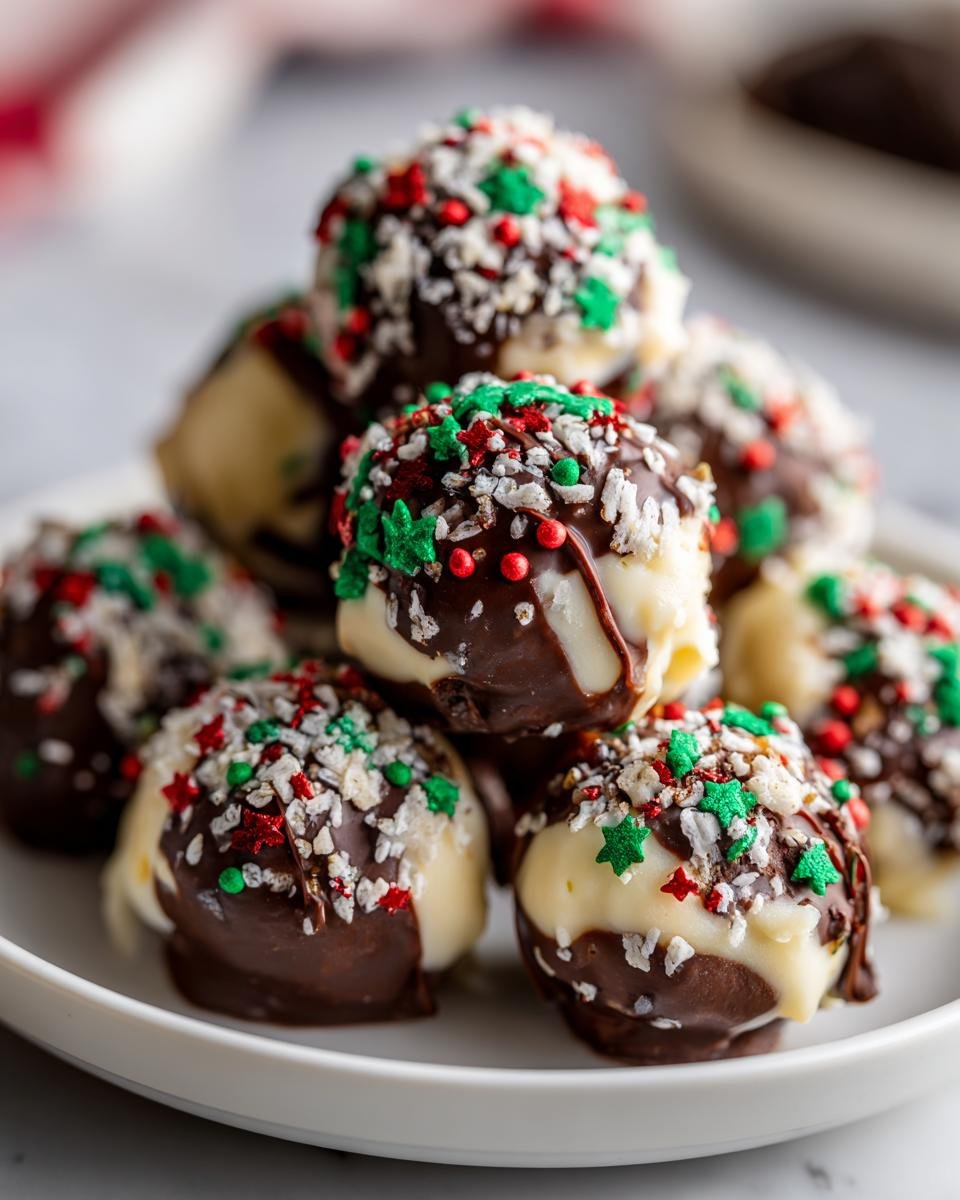
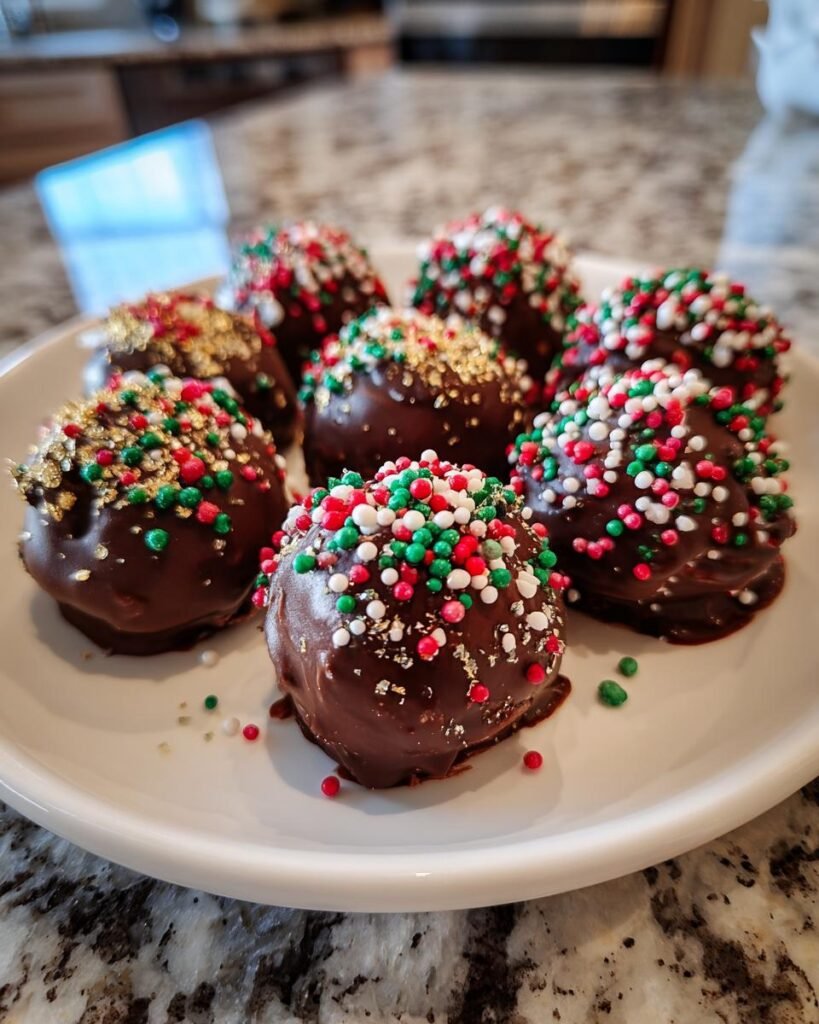
Once your Oreo balls are nice and firm, it’s time for the fun part—dipping! Take each ball and carefully dip it into the melted white chocolate, making sure it’s completely coated. I like to use a fork or a toothpick to lift them out, letting the excess chocolate drip off. Work quickly because you’ll want to sprinkle them with decorations before the chocolate hardens!
Step 7: Decorating
Before the chocolate sets, grab your sprinkles and sprinkle them on top of each ball. You can use festive colors like red and green for the holidays, or go wild with whatever you have on hand! This is where you can get creative—maybe even drizzle some colored chocolate over them later for an extra touch of flair!
Step 8: Setting the Chocolate
Last but not least, let those chocolate-coated beauties chill in the refrigerator until the chocolate has fully set. This usually takes about 15-20 minutes. Trust me, waiting is the hardest part, but once they’re ready, you’ll have the most delicious Holiday Oreo Balls to enjoy or share with loved ones!
Storage & Reheating Instructions
Storing your Holiday Oreo Balls is as easy as pie! Once they’ve set and you’ve enjoyed a few (or maybe more than a few, no judgment here!), place any leftovers in an airtight container. Make sure the container is sealed tight to keep them fresh and delicious.
You can store these treats in the refrigerator for up to a week. Just remember, they won’t last long because they’re so tasty! If you want to keep them longer, you can also freeze them. Just layer them between parchment paper in a freezer-safe container, and they’ll stay good for up to a month.
When you’re ready to enjoy them again, simply take them out of the freezer and let them thaw in the fridge for a couple of hours. No need to reheat—these little gems are perfect cold! Trust me, they’ll still be just as delightful, and you might even find that the flavors deepen a bit after some time in the fridge. Enjoy every last bite!
Tips for Success
Ready to take your Holiday Oreo Balls to the next level? Here are some tried-and-true tips that I’ve learned along the way to ensure you get the best results every time!
- Experiment with Chocolate: While white chocolate is a classic choice, don’t be afraid to mix it up! Dark chocolate, milk chocolate, or even colored chocolate melts can add a whole new flavor dimension and festive look to your treats. Just make sure to adjust melting times as needed—different chocolates can behave differently!
- Make Them Ahead of Time: These little bites of joy can be made a few days in advance! Just store them in an airtight container in the fridge, and they’ll be ready to impress your guests when the festivities roll around. It’s a huge time saver and gives you one less thing to worry about on the big day!
- Get Creative with Decorations: Sprinkles are fun, but why stop there? Try crushed nuts, coconut flakes, or even mini chocolate chips for a delightful crunch. You could also drizzle some melted chocolate over the top for an elegant touch. The more colorful, the better!
- Keep Everything Chilled: If your hands tend to get warm when rolling the balls, it can be helpful to chill the mixture in the fridge for about 10-15 minutes before forming them. This will make it easier to shape them without getting too sticky, ensuring they hold their form beautifully.
- Don’t Skip the Parchment Paper: Lining your baking sheet with parchment paper is crucial! It prevents the balls from sticking and makes cleanup a breeze. Trust me, you’ll thank yourself later when it’s time to remove those delicious treats!
Nutritional Information Section
Here’s the estimated nutritional information for each delightful Holiday Oreo Ball. Keep in mind, these values can vary based on specific ingredients used, but this should give you a good idea!
- Serving Size: 1 ball
- Calories: 120
- Fat: 7g
- Saturated Fat: 4g
- Unsaturated Fat: 2g
- Trans Fat: 0g
- Cholesterol: 10mg
- Sodium: 50mg
- Carbohydrates: 12g
- Fiber: 1g
- Sugar: 10g
- Protein: 1g
These little bites are not only delicious but can also fit into your holiday treat plans without breaking the calorie bank. Enjoy them guilt-free, and remember, it’s all about balance during the festive season!
FAQ Section
Can I use other types of cookies?
Absolutely! You can get creative with different types of cookies for your Holiday Oreo Balls. For instance, using chocolate chip cookies will yield a deliciously different flavor, while peanut butter cookies can add a rich, nutty twist. Just keep in mind that the texture might vary slightly, but experimenting is half the fun! You could even try flavored varieties like mint or lemon for a seasonal flair.
How long do these last in the fridge?
Your Holiday Oreo Balls will stay fresh in the fridge for about a week when stored in an airtight container. Just make sure they’re sealed properly to keep them from drying out. They might even taste a little better as the flavors meld together after a day or two!
Can I freeze the Oreo balls?
Yes, you can definitely freeze the Holiday Oreo Balls! To do so, just layer them between sheets of parchment paper in a freezer-safe container. They’ll keep well for up to a month. When you’re ready to enjoy them, simply let them thaw in the fridge for a couple of hours. They’ll be just as delicious as when you made them!
Why You’ll Love This Recipe
- Quick and Easy: These Holiday Oreo Balls come together in just about 20 minutes of prep time! No baking required means you can whip them up even on the busiest holiday days.
- Minimal Ingredients: With just four simple ingredients, you can create a delicious treat that everyone will adore. It’s a great way to use pantry staples!
- Always a Crowd-Pleaser: Trust me, these little bites of joy are always the first to disappear at gatherings. Their rich, creamy flavor is loved by kids and adults alike!
- Customizable: Feel free to get creative! You can switch up the chocolate or decorations to match any holiday theme or personal preference.
- Make Ahead: You can prepare these in advance, making them a stress-free dessert option for any holiday party or gathering.
For more recipes follow me in page Facebook and Pinterest.
Print
Holiday Oreo Balls: 7 Irresistible Treats for Joyful Moments
- Total Time: 50 minutes
- Yield: 24 balls 1x
- Diet: Vegetarian
Description
Delicious no-bake dessert balls made with Oreo cookies and cream cheese, perfect for the holidays.
Ingredients
- 1 package Oreo cookies (about 36 cookies)
- 8 oz cream cheese, softened
- 2 cups white chocolate chips
- Sprinkles for decoration
Instructions
- Crush the Oreo cookies in a food processor until fine crumbs form.
- In a bowl, mix the crushed Oreos with softened cream cheese until well combined.
- Roll the mixture into small balls and place them on a baking sheet lined with parchment paper.
- Freeze the balls for about 30 minutes.
- Melt the white chocolate chips in a microwave or double boiler.
- Dip each ball into the melted chocolate, coating completely.
- Place the chocolate-covered balls back on the baking sheet.
- Sprinkle with decorations before the chocolate hardens.
- Refrigerate until the chocolate sets.
Notes
- Store in an airtight container in the refrigerator.
- Try using different types of chocolate for dipping.
- These can be made ahead of time for holidays.
- Prep Time: 20 minutes
- Cook Time: 0 minutes
- Category: Dessert
- Method: No-bake
- Cuisine: American
Nutrition
- Serving Size: 1 ball
- Calories: 120
- Sugar: 10g
- Sodium: 50mg
- Fat: 7g
- Saturated Fat: 4g
- Unsaturated Fat: 2g
- Trans Fat: 0g
- Carbohydrates: 12g
- Fiber: 1g
- Protein: 1g
- Cholesterol: 10mg
Keywords: Holiday Oreo Balls, no-bake dessert, Oreo dessert