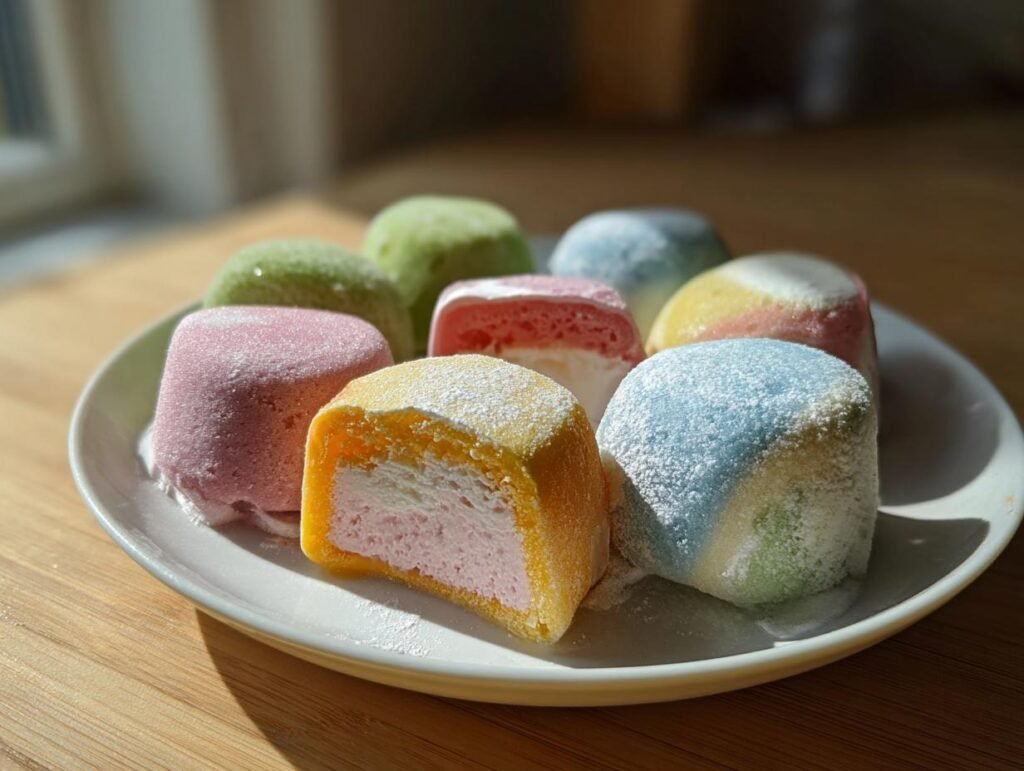
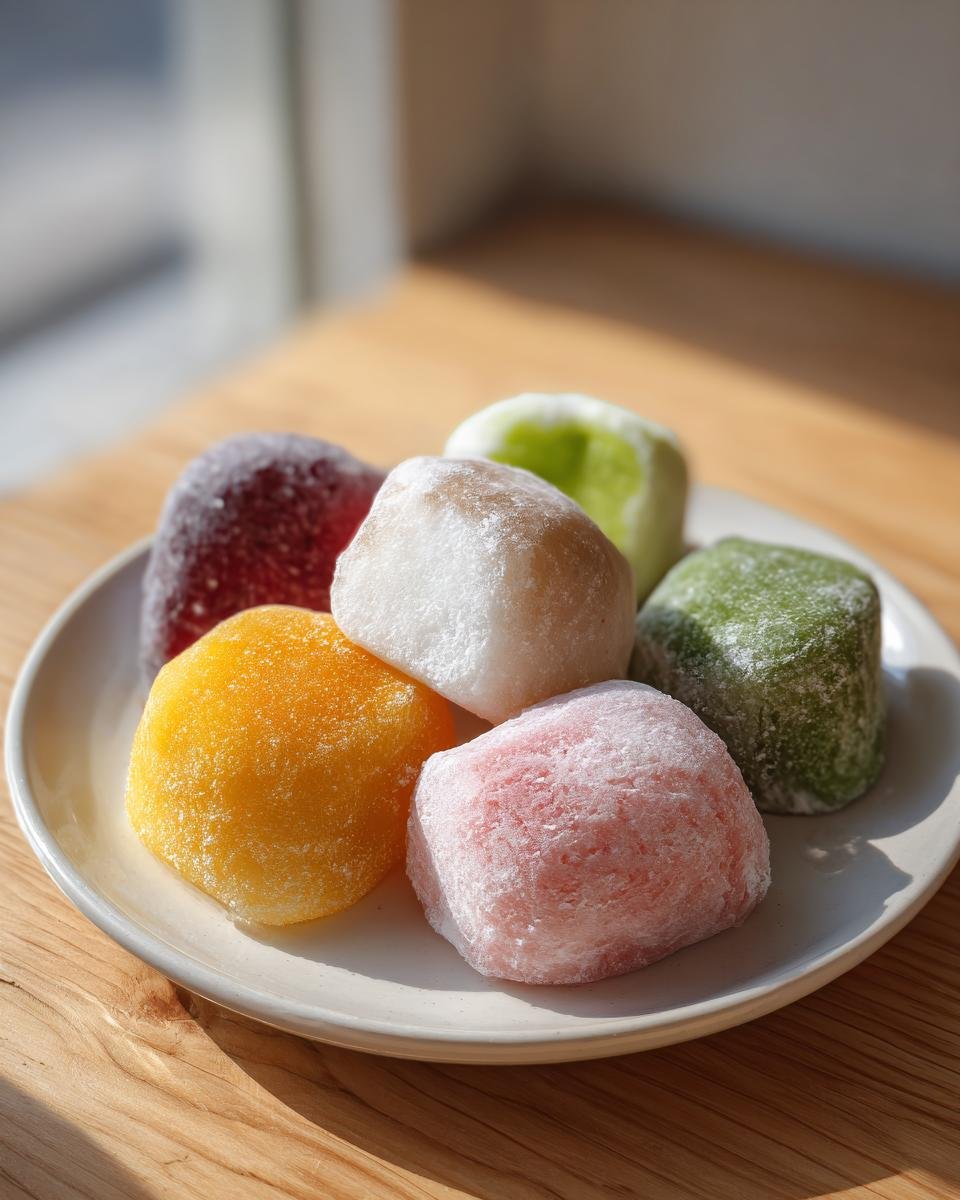
Mochi Ice Cream has taken the dessert world by storm, and it’s easy to see why! The delightful combination of chewy rice dough wrapped around creamy ice cream creates a unique texture that’s simply irresistible. I still remember the first time I tried it at a little Japanese market. It was a warm summer day, and I was curious about this colorful, squishy treat. One bite, and I was hooked! The way the mochi hugged the ice cream was a revelation. I couldn’t believe something so simple could be so magical. Since then, I’ve made it my mission to recreate that experience at home, and let me tell you, making Mochi Ice Cream is a fun adventure! Whether you’re a mochi enthusiast or a curious newbie, this recipe is a must-try. Trust me, once you take that first bite, you’ll be in love!
Ingredients List
To make the most delightful Mochi Ice Cream, you’ll need a few simple ingredients. Here’s what you’ll want to gather:
- 1 cup glutinous rice flour: Also known as sweet rice flour, look for brands like mochiko or shiratamako for the best results. This is the star of your mochi dough!
- ¼ cup sugar: Regular granulated sugar sweetens the dough perfectly, balancing the flavors of the ice cream.
- 2 tablespoons powdered sugar: This adds a touch of sweetness and helps prevent the mochi from sticking together.
- 1 cup water: Essential for mixing with the dry ingredients to create that perfect dough consistency.
- Food coloring (optional): If you want to add a fun twist, a few drops can give your mochi a pop of color!
- Cornstarch or potato starch: You’ll need this for dusting your work surface and the dough to keep everything from sticking.
- Ice cream (any flavor): This is where you can get creative! Choose your favorite flavor, from classic vanilla to adventurous green tea or mango.
With these ingredients, you’re all set to create your own batch of delightful Mochi Ice Cream!
How to Prepare Mochi Ice Cream
Now that you have your ingredients ready, let’s dive into the delightful process of making Mochi Ice Cream! Don’t worry, I’ll guide you every step of the way!
Step 1: Prepare the Ice Cream Balls
First things first, you’ll want to scoop out your favorite ice cream into tightly packed balls. A cookie scoop works wonders here! Aim for about 1.5 inches in diameter. Place these little gems on a parchment-lined sheet pan. Once you have them all scooped, pop them in the freezer for at least an hour. This step is crucial—if the ice cream isn’t cold enough, the mochi won’t wrap properly!
Step 2: Make the Mochi Dough
While your ice cream balls are freezing, let’s make the mochi dough! In a microwave-safe bowl, mix the glutinous rice flour, sugar, and water until you get a smooth batter. It should be lump-free and a bit runny. Cover the bowl with a microwave-safe lid or plate, and microwave it for 1 minute. After that, carefully remove it (it’s hot!). Wet a spatula and fold the dough gently to incorporate the heat. Cover it again and microwave for another minute. You’ll notice the dough becoming slightly shiny and puffy. Give it one more fold, then microwave for 30 seconds more until you achieve that glossy look! The dough should be elastic and stretchy, but not too sticky.
Step 3: Roll and Cut the Dough
Now comes the fun part! Dust your work surface liberally with cornstarch to prevent sticking. Carefully transfer the hot mochi dough onto the dusted surface. Use a rolling pin to roll it out to about ¼ inch thick—just thick enough to wrap around your ice cream. Once rolled, refrigerate the dough for about 30 minutes to firm it up a bit. After chilling, it’s time to cut! Grab a round cutter (about 3 inches in diameter) and cut circles from the dough. Don’t forget to brush off any excess cornstarch before moving on!
Step 4: Wrap the Ice Cream
This is where the magic happens! Take one of your chilled ice cream balls and place it in the center of a dough circle. Gently stretch the dough around the ice cream, pinching it at the top to seal it. Make sure it’s wrapped tightly—no one wants ice cream leaking out during the freeze! Take your time here; the more care you put into this step, the better your final product will be.
Step 5: Final Freezing
Once wrapped, carefully place the mochi balls seam-side down on a parchment-lined tray. Wrap each one tightly in plastic wrap, twisting the top to seal it in. Now, return them to the freezer for at least an hour to set. Trust me, this final freeze is crucial for achieving that perfect texture when you’re ready to serve!
Tips for Success
Making Mochi Ice Cream is a fun adventure, but a few tips can help you nail it every time! First, don’t skip the chilling step for your ice cream balls. If they’re not firm enough, the mochi can get messy, and nobody wants that! When it comes to the dough, remember that the texture is key. If it’s too sticky, dust it with a little more cornstarch while rolling it out. You can also experiment with flavors! Try adding cocoa powder for a chocolatey twist or matcha for a lovely green tea flavor. Feeling adventurous? Swap out traditional ice cream for sorbet or even yogurt for a lighter treat. And if you’re in a pinch, using a pre-made ice cream can save you time. Just make sure it’s a flavor you love! With these tips, you’re all set to impress your friends and family with your homemade Mochi Ice Cream!
Nutritional Information
While I strive to provide accurate nutritional information for my Mochi Ice Cream, please keep in mind that values can vary based on the specific ingredients and brands you use. The provided data is an estimate and not an exact measure. Always check labels for precise details!
FAQ Section
Q1: Can I use different flavors of ice cream for my Mochi Ice Cream?
Absolutely! The beauty of Mochi Ice Cream is that you can get as creative as you want. Whether you prefer classic vanilla, rich chocolate, or something adventurous like green tea or mango, the choice is yours! Each flavor adds its unique twist to the chewy mochi.
Q2: How should I store leftover Mochi Ice Cream?
Once you’ve wrapped your mochi, store them in a freezer-safe container to keep them fresh. They can last up to three months! Just remember to let them sit at room temperature for a few minutes before enjoying, as that chewy texture shines when they’re slightly softened.
Q3: What if I want to try different fillings?
Great question! While ice cream is the traditional filling, you can swap it out for other delicious options like chocolate spread, peanut butter, or even sweet red bean paste for a fun twist.
Q4: Can I make the mochi dough ahead of time?
Yes, you can prepare the mochi dough in advance! Just store it in an airtight container in the fridge for up to two days. When you’re ready to use it, let it come to room temperature before rolling it out.
Q5: Is Mochi Ice Cream gluten-free?
Yes! Since mochi is made with glutinous rice flour, which is gluten-free, this dessert is a delightful option for those avoiding gluten. Just double-check your ice cream’s ingredients to ensure it’s gluten-free too!
Why You’ll Love This Recipe
- Easy Preparation: With just a few simple ingredients and steps, you’ll have homemade Mochi Ice Cream ready to impress!
- Customizable Flavors: Choose any ice cream flavor you love, or even try fun fillings like chocolate spread or sweet red bean paste.
- Unique Texture: The chewy mochi dough paired with creamy ice cream creates a delightful contrast that’s simply irresistible.
- Fun Activity: Making Mochi Ice Cream is a great way to spend time with friends or family, turning it into a fun kitchen adventure.
- Impressive Treat: Your homemade mochi will wow guests at parties or gatherings, making you the star of dessert!
Serving Suggestions
When it comes to enjoying your homemade Mochi Ice Cream, the possibilities are endless! Pair it with a warm cup of green tea for a delightful contrast that enhances the flavors of the mochi. If you’re feeling adventurous, try serving it alongside a drizzle of rich chocolate or caramel sauce for an indulgent treat. Fresh fruit, like strawberries or mango slices, adds a refreshing touch and balances the sweetness perfectly. You could even whip up a light fruit salad to complement the chewy texture. Whatever you choose, these pairings will elevate your Mochi Ice Cream experience!
Storage & Reheating Instructions
Storing your leftover Mochi Ice Cream is super easy! Just keep the wrapped mochi in a freezer-safe container to protect them from freezer burn. They’ll stay fresh for up to three months. When you’re ready to enjoy them, simply let them sit at room temperature for about 5 minutes. This brief wait allows the mochi to soften slightly, making that chewy texture even more delightful! If you happen to have any pieces unwrapped, just pop them back in the freezer immediately to maintain their quality. Trust me, this little step makes all the difference!
For more recipes follow me in page Pinterest.
Print
Mochi Ice Cream: 5 Irresistible Tips for Perfect Treats
- Total Time: 1 hour and 34 minutes
- Yield: 12 pieces 1x
- Diet: Vegetarian
Description
Mochi Ice Cream is a delicious treat made with a chewy rice dough wrapped around your favorite ice cream flavor.
Ingredients
- 1 cup glutinous rice flour (sweet rice flour such as mochiko or shiratamako)
- ¼ cup sugar
- 2 tablespoons powdered sugar
- 1 cup water
- Food coloring (optional)
- Cornstarch or potato starch (for dusting)
- Ice cream (any flavor)
Instructions
- Line a sheet pan with parchment paper. Scoop tightly packed ice cream balls with a flat base. Freeze for 1 hour.
- In a microwave-safe bowl, mix rice flour, sugar, powdered sugar, and water until smooth. Cover and microwave for 1 minute. Wet a spatula and fold the dough.
- Cover and microwave another 1 minute. Fold again.
- Microwave 30 seconds more (or until dough looks slightly shiny).
- Dust parchment paper with cornstarch. Transfer the hot dough onto it. Dust the top with more starch and roll to about ¼-inch thickness. Refrigerate the rolled dough for 30 minutes.
- Cut squares of plastic wrap for each mochi piece.
- Cut 3-inch circles from the chilled dough. Brush off excess starch. Place one frozen ice cream ball in the center of each circle. Gently stretch and pinch the dough around the ice cream to seal.
- Wrap tightly in plastic wrap, twisting at the top.
- Place wrapped mochi back in the freezer, seam-side down. Freeze at least 1 hour before serving. Store wrapped mochi in a freezer-safe container for up to 3 months. Let sit at room temperature briefly before eating.
Notes
- Works with any ice cream or sorbet flavor.
- Alternative fillings: chocolate spread, peanut butter, strawberries, or sweet red bean paste.
- Flavor the dough before cooking with cocoa powder, matcha, vanilla, coconut milk, or peanut butter.
- Prep Time: 30 minutes
- Cook Time: 4 minutes
- Category: Dessert
- Method: Microwave
- Cuisine: Japanese
Nutrition
- Serving Size: 1 piece
- Calories: 70
- Sugar: 5 g
- Sodium: 1 mg
- Fat: 1 g
- Saturated Fat: 1 g
- Unsaturated Fat: 0 g
- Trans Fat: 0 g
- Carbohydrates: 16 g
- Fiber: 1 g
- Protein: 1 g
- Cholesterol: 0 mg
Keywords: Mochi Ice Cream, Japanese dessert, chewy dessert, ice cream treat